
Preamble
Welcome back to the Angular 2 Vs ReactJs web series. By this time, we should have our app up and running (in case you haven’t, you can build it using Part 1 here). Our goal in this part is to grasp how Angular 2 and React handle data. We will then compare the performance time differences between Angular 2 and React to display N number of data.
Specification
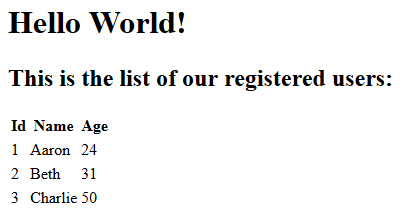
Our sample data will contain a list of users. A user has an id, a name, and an age as properties. We will display the sample data in a table like this:
Displaying Data in Angular 2
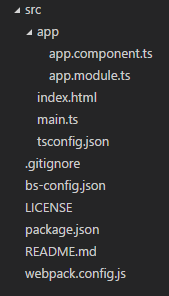
Let’s start off from our initial setup app from Part 1 (which can be downloaded here). Our current app structure looks like this:
First we need to create an interface for handling the user data. Create an index.ts in “~/src/app/interface/user”:
export interface IUser {
    id: number;
    name: string;
    age: number;
}
Now that we have the interface, let’s add some mock user data to be displayed. Create an index.ts in “~/src/app/mockData/user”:
import { IUser } from "../../interface/user";
export const mockUsers: IUser[] = [
    {
        id: 1,
        name: "Aaron",
        age: 24
    },
    {
        id: 2,
        name: "Beth",
        age: 31
    },
    {
        id: 3,
        name: "Charlie",
        age: 50
    }
];
The Angular components in the app still uses inline templates. As our app gets bigger and the templates get more complex, it will be better for maintainability to use external templates for all components instead. Let’s make our app.component.ts use an external template. First, we create the app.html in the same folder as the component:
<h1>Hello World!</h1>
<my-user-list></my-user-list>
Then, we tell app.component.ts to use this app.html template by using templateUrl in the @Component decorator:
import { Component } from "@angular/core";

@Component({
  selector: "app",
  templateUrl: "/app/app.html"
})

export class AppComponent { }
Notice the HTML my-user-list tag; it will be the name of the component displaying the user data. Let’s create that component now. Create a user-list.component.ts in “~/src/app/userList”:
import { Component } from "@angular/core";

import { IUser } from "../interface/user";
import { mockUsers } from "../mockData/user";

@Component({
  selector: "my-user-list",
  templateUrl: "/app/userList/user-list.html"
})

export class UserListComponent {
    private userList: IUser[] = [];

    constructor() {
        this.userList = mockUsers;
    }
}
We use the @Component decorator to make the UserListComponent class as an Angular component. The selector is what the component called from the HTML using the HTML tag and the templateUrl is the component’s external template location. To use the mock user data, a userList property is created in this component and the mock data will be passed to this property in the component constructor.
Displaying data in Angular 2 is easy; we only need to type the name of our property in the component’s template and we are done! Let’s create the template for this UserListComponent called “user-list.html” in “~/src/app/userList”:
<h2>This is the list of our registered users:</h2>
<table>
    <thead>
        <tr>
            <th>Id</th>
            <th>Name</th>
            <th>Age</th>
        </tr>
    </thead>
    <tbody>
        <tr *ngFor="let user of userList">
            <td [innerHTML]="user.id"></td>
            <td [innerHTML]="user.name"></td>
            <td [innerHTML]="user.age"></td>
        </tr>
    </tbody>
</table>
Since our userList property is an array, we need ngFor to iterate through each element of the array. The “user” variable in the ngFor is the currently-accessed userList element. We bind this variable’s id, name, and age properties in the HTML using the [innerHTML] attribute. The square brackets are Angular syntax indicating the value appears from the code side, which is from the component.
At this point the UserListComponent is done. It will display all of the mock user ids, names, and ages in the template. The final step is to register this component in our module. Go to “~/src/app” and include UserListComponent in the declarations of our AppModule in app.module.ts:
import { NgModule }      from "@angular/core";
import { BrowserModule } from "@angular/platform-browser";
import { AppComponent }  from "./app.component";
import { UserListComponent }  from "./userList/user-list.component";

@NgModule({
  imports: [ BrowserModule ],
  declarations: [
    AppComponent,
    UserListComponent
  ],
  bootstrap: [
    AppComponent
  ]
})

export class AppModule { }
Type “npm install” and “npm start” in the terminal to start our application and see the result. The full code is available here.
Displaying Data in React
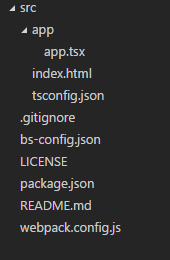
Let’s start again from the initial setup app (source can be downloaded here). Our app structure currently looks like this:
Before we continue, we need to create the interface for handling the user data and add the mock user data. It is exactly the same as how we did it in the Angular 2 section.
The structure of this React app will follow the structure guide in the React documentation. I found out that this structure will make each folder handle a single component, therefore renaming our component into index.tsx is convenient. This way we can import a component like this: “./src/app” instead of: “./src/app/app.tsx”. So let’s rename our app.tsx into index.tsx and don’t forget to update our webpack.config.js to use “./src/app”.
We will now break our app like this:

A user row component is responsible for displaying the data for a user. A user table component is responsible for displaying the table and creating user row components for each user. This user table component will then be put in the user list component which hold the complete list of user data. And since the user list component is a part of our application, it will be put in the app component.
Let’s first create the user row component. Paste this code in “~/src/app/userList/components/userTable/components/userRow/index.tsx”:
import * as React from "react";

import { IUser } from "../../../interface/user";

interface UserRowProps {
    user: IUser;
}

interface UserRowState { }

export class UserRow extends React.Component<UserRowProps, UserRowState> {
    render(): JSX.Element {
        return (
            <tr>
                <td>{this.props.user.id}</td>
                <td>{this.props.user.name}</td>
                <td>{this.props.user.age}</td>
            </tr>
        );
    }
}
In TypeScript, a React component is a class which extends the React.Component<Props, State> abstract base class. The “Props” is data that’s value is set by its component’s parent. The value can’t be modified throughout the lifetime of its component. The “State” is data that’s value can be modified. In TypeScript, we need to add an interface for Props and State so that IntelliSense knows what data is handled in the Props and State. Currently, the UserRow component only gets user data from its parent, the UserTable component, and won’t be modified afterwards. Therefore, we put the user variable in the Props instead of the State.
The render() method in the React component will be called when that component is called from the JSX.Element and will return the specified JSX.Element.
Now let’s go on to the UserTable component. Paste this code in “~/src/app/userList/components/userTable/index.tsx”:
import * as React from "react";

import { IUser } from "../../../interface/user";
import { UserRow } from "./components/userRow";

interface UserTableProps {
    users: IUser[];
}

interface UserTableState { }

export class UserTable extends React.Component<UserTableProps, UserTableState> {
    constructor(props) {
        super(props);
    }

    private getUserRows(): JSX.Element[] {
        return this.props.users.map(mockUser => {
            return (<UserRow user={mockUser} key={mockUser.id} />);
        })
    }

    render(): JSX.Element {
        return (
            <table>
                <thead>
                    <tr>
                        <th>Id</th>
                        <th>Name</th>
                        <th>Age</th>
                    </tr>
                </thead>
                <tbody>
                    {this.getUserRows()}
                </tbody>
            </table>
        );
    }
}
As the user data will be handled by the UserList component and then get passed to UserTable component, the user variable in UserTable component will be put in the Props. The responsibility of UserTable component, which is to display a list of UserRow components for all users, is fulfilled using getUserRows() method. To pass a value into the child component’s Props, simply type the name of the child component’s Props as an HTML attribute and put the value in that attribute.
Notice the key attribute in the UserRow tag. A list (or an array) of elements should have this key attribute because as the documentation says:
Keys help React identify which items have changed, are added, or are removed. Keys should be given to the elements inside the array to give the elements a stable identity. The best way to pick a key is to use a string that uniquely identifies a list item among its siblings. Most often you would use IDs from your data as keys.
Next let’s create the UserList component. Paste this code in “~/src/app/userList/index.tsx”:
import * as React from "react";

import { IUser } from "../interface/user";
import { mockUsers } from "../mockData/user";
import { UserTable } from "./components/userTable";

interface UserListProps { }

interface UserListState {
    users: IUser[];
}

export class UserList extends React.Component {
    private startTime = 0;
    private endTime = 0;

    constructor(props) {
        super(props);
        this.addUsers = this.addUsers.bind(this);
        this.clearUsers = this.clearUsers.bind(this);
        this.state = {
            users: []
        };
    }

    componentDidUpdate() {
        this.endTime = performance.now();
        let timeSpent = this.endTime - this.startTime;
        console.debug(timeSpent + " ms.");
    }

    private addUsers(): void {
        this.startTime = performance.now();
        this.setState({
            users: mockUsers
        });
    }

    private clearUsers(): void {
        this.startTime = performance.now();
        this.setState({
            users: []
        });
    }

    render(): JSX.Element {
        return (
             <div>
                 <h2>This is the list of our registered users: </h2>
                <UserTable users={this.state.users} onUserAddition={this.addUsers} onUserClearance={this.clearUsers}/>
             </div>
        );
    }
}
Users are handled in this UserList component, therefore the “users” variable will be put in the State. To set the value to a state variable, simply use the setState() method.
The last step is to call this UserList component from our App component. Paste this code in “~/src/app/index.tsx”:
import * as React from "react";
import * as ReactDOM from "react-dom";

import { UserList } from "./userList";

interface AppProps { }

interface AppState { }

export class App extends React.Component<AppProps, AppState> {
    render(): JSX.Element {
        return (
            <div>
                <h1>Hello World!</h1>
                <UserList />
            </div>
        );
    }
}

ReactDOM.render(
    <App />,
    document.getElementById("app")
);
And we are done! Type “npm install” and “npm start” in the terminal to start our application and see the result. The full code is available here.
Comparing Performance Time Needed to Display N Number of Data
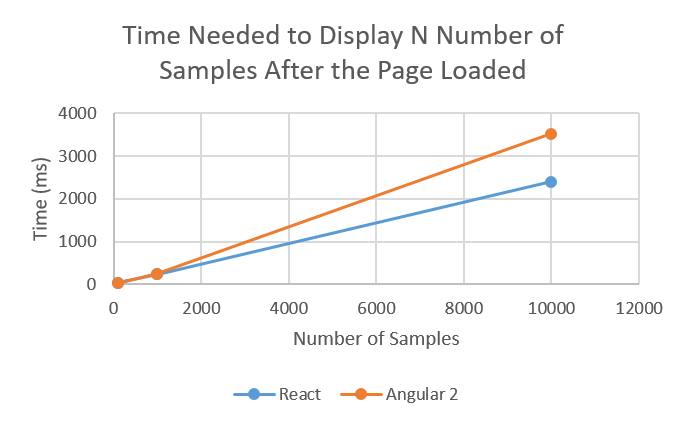
In this section, I tested the time needed for both Angular 2 and React to display N number of user data after the page has been loaded. Three test cases were used in the test, each containing different number of users (100, 1000, and 10k users). Each test case was repeated thirty times, the average time was put into the graph shown below:
Conclusion
As we can see, there’s no significant difference in the performance time between Angular 2 and React to display data. Even displaying for 10k samples, the time difference is only ±1 second. The difference shown in this tutorial is caused only by the code style.
Significant code style differences:
- Angular 2 puts components in the HTML, while React puts HTML in its component.
- React introduces Props and State data. Props is data by which the value is set by its component’s parent and can’t be modified throughout the lifetime of its component. State is data by which the value can be modified.
- In Angular 2, a component needs to be registered in an Angular module before it can be used, whereas in React, calling another component’s name in the JSX element would suffice.
Based on the performance, it seems that choosing between Angular 2 and React is only a matter of preferences.
Samuel is a developer at Palador. He is a Microsoft Certified Professional in Developing Azure Solutions.